Containter Growing
Homegrown Tomato Garden – New Decade, New Location
Happy New Year! My homegrown tomato garden is celebrating the new decade in a new location. I don’t live in S. Florida anymore — I am in eastern Tennessee. My normal growing pattern is topsy-turvey; no Winter planting, but I do get to grow through the summer.
I’ve gone from 10a for a plant hardiness zone to 7a. Which basically means a chilly winter with plenty of freezes, and a last expected frost date in mid-April. But interestingly so far, with all the frosts we’ve had so far this Fall and Winter, our yard doesn’t seem to collect frost; across the street does, though. Talk about being in a micro-climate!
Primary Grow Space
Different State, Different Soil for the Tomatoes
I’m used to sandy soil, which is fairly easy to dig up. I had a lovely spot planned for the garden for my homegrown tomatoes; I was going to rototill it, put down plenty of compost. First, I decided to plant a few daffodil bulbs nearby. Imagine my surprise when instead of an easy to dig soil, I found compacted clay and rocky soil. Argh! (I barely got 10 bulbs planted before I gave up.)
There goes my plans for rototilling the garden. I’d have to put down so much compost and perlite that I’d be rototilling for weeks, and spend many hundreds of dollars. With those plans out the window, I’m turning to container gardening.
Container Tomato Garden For 2020
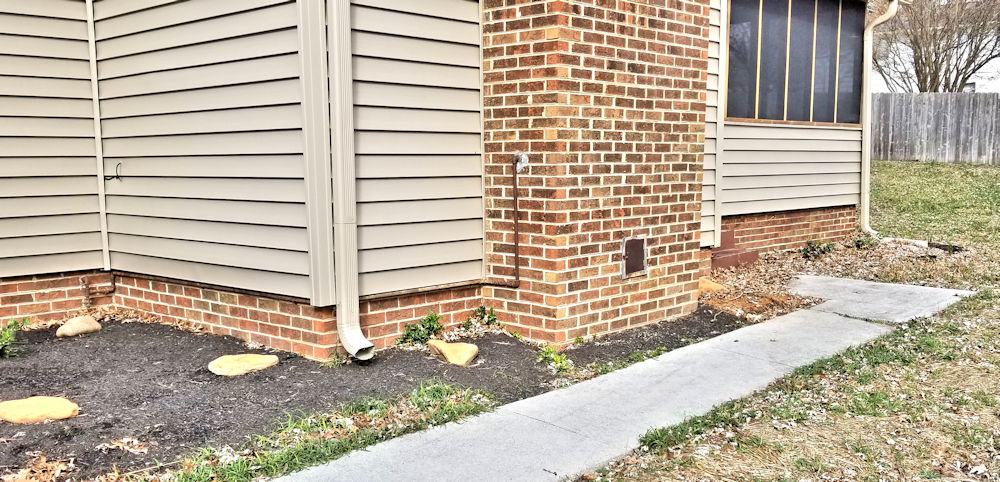
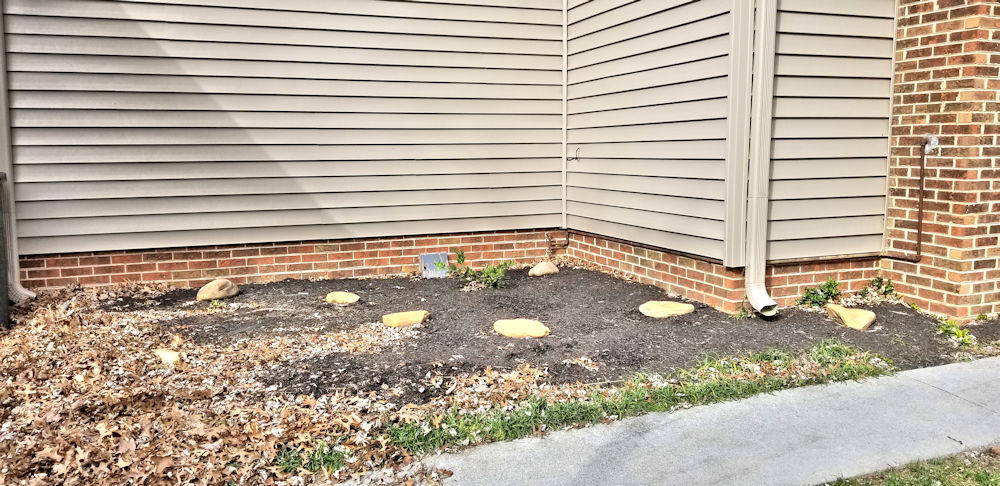
Secondary Grow Space
Fortunately, I’ve had a lot of experience with container gardening my tomatoes. The approximately 12 x 7 foot garden plot will be festooned with 3-gallon, 5-gallon, 7-gallon and 10-gallon grow bag containers. I have some room to expand a little to the northeast of that plot, maybe a little more across the walkway.
Right now it doesn’t look like much; well, it is the tag end of December. I still have to pull up one bush that is in my way, but I think it’s small enough to not give me too much trouble. But, it faces southeast and is protected by the house on 3 sides, giving it another micro-climate; I may be able to put out at least some of my plants a week or so before the last expected frost date.
Well, this should be interesting, to say the least! My growing situation is much different from where I gardened for some 20 years. I am very much looking forward to see what kind of homegrown tomatoes I can successfully garden here, and share the results with you. 😀
Soil for Container Gardening
You’ve decided to create a container garden of one or more containers, or are using raised beds. You have the containers/beds…but what do you fill them with? As I mentioned in my tomatoes in containers post, it’s time to talk soil.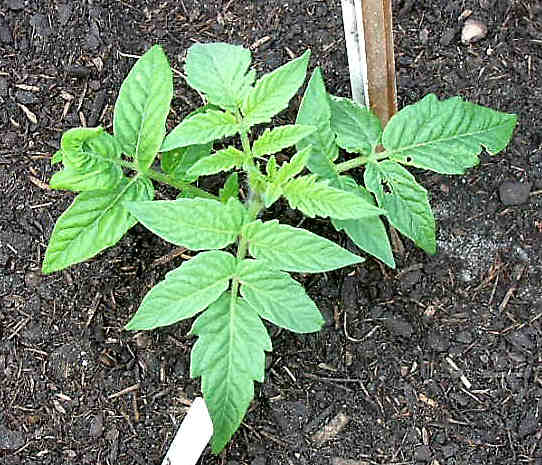
Ready Made or Mix Your Own?
To be honest, I would rather go with pre-bagged, if I could find exactly what I wanted, in the amounts I needed, at a good price. Given that I am still trying to fill something along the lines of 15 containers from 5 to 25 gallons each, that doesn’t quite work out — for me or the plants. For that kind of quantity, quality bagged potting soil can be expensive. However, if you are just filling a couple of 5 gallon containers, bagged potting soil might be just right for you.
The most important thing for container plants is that the roots have enough water and air. In order for water and air to penetrate the soil, it needs little spaces to slip into.
As a somewhat exaggerated example, it’s almost impossible for air and water to penetrate much into concrete. However, water and air pass easily through gravel. (Although I don’t recommend trying to grow in either, LOL.) 😉
So what you are looking for is soil that has enough space for air and water, but not so much that water pours right though it. Just keep thinking about Goldilocks and getting the mixture “just right”. 😉
Potting Mix, Garden Soil – What’s the Difference?
A potting mix is made especially for growing plants in containers. A bag of garden soil, though, is made to be mixed in with your current soil — not just placed in your containers without any intervention.
A good potting mix is fluffy, with plenty of perlite or vermiculite and sphagnum peat moss or coconut coir (in addition to compost, of course). Garden soil tends to be heavy, with little or no perlite, vermiculite or moss/coir. Putting the bagged garden soil into your containers without lightening it up some will doom your plants to a slow death. Or at the very least, a much smaller harvest, because the plant roots have a hard time breathing.
What About “Mel’s Mix”?
Mel Bartholomew, of Square Food Gardening (SFG) fame, recommends the following mix. Although I don’t use the SFG method with the grid, etc., I do like the basics of his soil mix. It is:
- 1/3 Compost
- 1/3 Vermiculite
- 1/3 Peat Moss or Coconut Coir
The catch is that the compost needs to be from several sources. In other words, look at the ingredients that go into the compost you plan to use. If you’re not making the compost yourself (and maybe even if you are), you don’t want everything to be from one source.
For example, instead of buying 3 bags of compost that are all based on cow manure, you would want a bag of the cow manure-based compost, one of humus-based and another of poultry litter-based.
That being said, if you can’t find compost made from varying ingredients, try to at least get some from different manufacturers.
BTW, I do recommend reading Mel’s book, the All New Square Foot Gardening, Third Edition.
Other Ingredients?
Well, there are other “goodies” you can use to feed your soil, but that is a whole separate post. I’ll come back and put a link to that post when I have it completed. I am doing some experimenting, and so far the results have been quite interesting.
Mixing it Up
I typically mix my contain gardening soil up in a wheelbarrow — those 20 gallon pots really take a lot to fill them up! But sometimes, I only need to make up enough for a small planter.
For a small batch, I get one of those 5-gallon buckets (like you can get at Home Depot or Lowes) and scoop in a few trowels worth of compost. Next I’ll put in a trowel of vermiculite, another of perlite and then a scoop or two of coconut coir. I’ll mix that around with my trowel until it’s nice and blended, then pour it into its pot.
If the pot doesn’t end up being quite full enough, I’ll just throw in a handful or two of each of the above, then mix it all up by hand.
Compost is Your Plant’s Friend
I’d be remiss if I didn’t talk a little more about compost. If you have your own pile, you have ready access to it, and it’s probably full of all sorts of goodies for your tomato plants. If you don’t have a compost pile, you’ll need to go with a bagged compost.
When you walk down the aisles of your garden center, you’re likely to find several different brands of bagged compost. Take a look at the bags and read the ingredients. In Florida where I live, it’s heavy on the composted cow manure — believe it or not, we’re one of the top states for producing cattle (and you just thought we were beaches). What’s harder to find are composts from forest humus or mushroom compost. Read the labels, and if you can, get at least two different kinds. Each type is a little different with the (good) soil bacteria and/or (good) fungi, and so provides a more balanced set of nutrients.
Don’t make the mistake of thinking that all you need in your container is compost, though — it’s a bit too heavy (been there, done that). You will need to mix it with one or more of the perlite, vermiculite, etc. before planting your tomatoes in it.
For the few times I’ve planted in straight compost, the plants didn’t do so great. Yes, they grew and produced tomatoes but they seemed didn’t grow or produce as well as the containers where I had a mix.
Whew — that was a long post. Hopefully this has been helpful for you!
Container Gardening and Tomatoes
Container gardening and tomatoes really do go together. After all, you will still give the plant what it needs — good soil, plenty of water, fertilizer (organic or not) and lots of sunshine.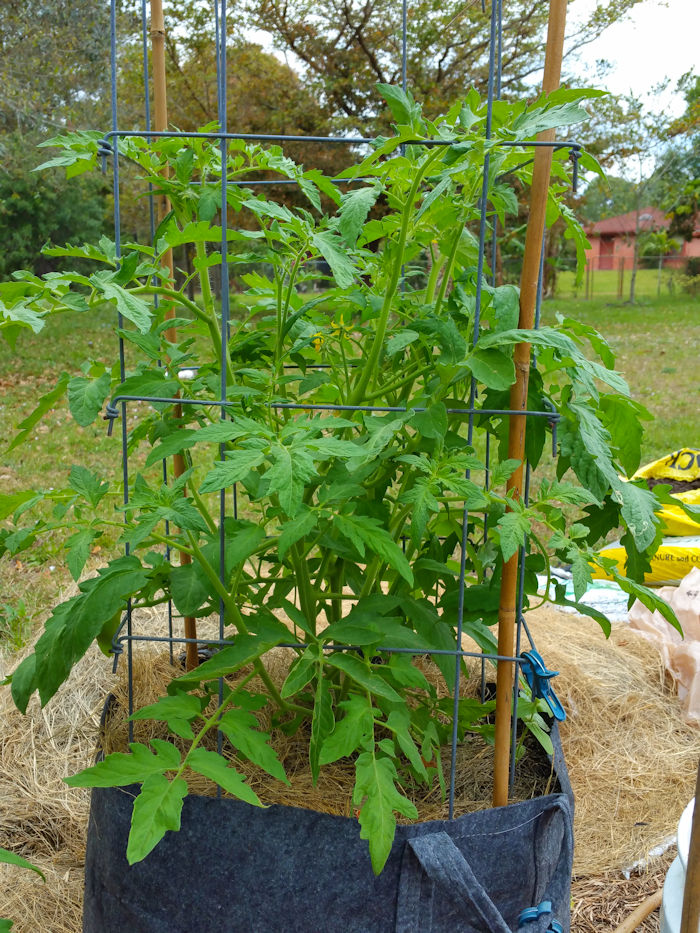
You’ll just be doing it in a different place.
Containers 101
You can’t just grab any old container and stick your tomato plant in it — as the old saying goes, “size matters”. You need to consider the size of the plant versus the size of the container. Typically, the container measurement will be in gallons.
For a determinate tomato, you can usually get away with a 5-gallon container, although a 7 gallon is nicer, if you can get one. Since determinate tomatoes have a limited lifespan, they are usually smaller — and sometimes a lot smaller. For the itty-bitty plants, you could even use a 3 gallon pot.
When it comes to the indeterminate plants, container size does make a difference, between a decent enough harvest and a good harvest. Most indeterminate plants are pretty darn big (I’ve had Brandywines grow to 6 feet tall and 5 feet wide when I let them), so your container needs to reflect that.
For these hefty plants, I use containers anywhere from 15 gallons (for the smaller ones) up to 25 gallons for the Brandywine and Kellogg’s Breakfast tomatoes.
Yes, you can grow indeterminate tomato plants in smaller containers; but when you have a big plant, anything smaller than 12 gallons will definitely sacrifice some tomato production.
With the exception of indeterminate dwarf tomatoes — you can go with a 7 gallon container, and even a 5-gallon for a smaller dwarf.
The Dirt on Soil
One of the downsides of moving to an all-container garden is that I have to buy a lot of soil. Nope, I can’t just shovel what’s on the ground into my containers. For one, I’d have a lot of big holes in the yard, LOL. Second, it wouldn’t be great soil for the most part. My compost pile won’t fill all the containers — what’s a person to do?
And that is to drive on down to the lawn and garden center and buy lots of bags of compost and potting soil. And when it turns out I made a bad choice in potting soil, I have to turn around and buy some perlite, vermiculite and/or sphagnum moss to amend my bad choice.
And when I get all those (very heavy) bags home, I still have to get that soil into the containers. So yeah, it’s a pain to move from in-ground to container gardening all in one fell swoop. But if you’re just trying out a couple of containers to get your feet wet, it’s really not bad at all.
What’s in Your Potting Soil?
I have learned that not all bags labeled potting soil are created equal. Some are really nice, others not so much. What you have to remember is that your plants need to be able to drink and breathe. It’s an important topic, so I have a whole separate post talking just about soil for container gardens.
Have you ever watered a planter that was filled with sand? You know that maybe 15 minutes after watering it, the soil is dry again. This means you need to increase the water-holding capacity of sandy soils.
What about a clay soil — water it, come back tomorrow and it might still be “clay soup”. In this situation, you need to increase the drainage capability.
So, compost is first on my list of “necessary ingredients” in a good potting soil, because it can both increase water-holding for sandy soil, and help with drainage on clay-based soils. However, compost alone might make the soil too heavy. Enter perlite, which lightens the soil, to give the roots breathing room.
(BTW, perlite is a natural substance, as are its comrades vermiculite and sphagnum moss.)
My current favorite ready-made potting soil is from Vigoro, in the orange bags labeled as organic. Very nice consistency, if a bit on the pricy side. I don’t have to add anything to it — just pour it into the container and plant away!
Surprisingly, Miracle-Gro’s potting soil leaves a lot to be desired — it’s very heavy and the bags I got were full of sticks (not my idea of proper drainage). I like most of their stuff, but the potting soil is low on my “buy again next time” list. I have had to add perlite and sphagnum moss to lighten it up some. Plus, I am not all that crazy about all the fertilizer they include in it.
Mixing Your Own
I think I’ll stop for now, since this has gotten fairly long, and write up a separate entry for ideas on mixing your own potting soil. So until next time — keep on growing!
Can I Grow Cherry Tomatoes in a Container
If you’re asking, “Can I grow cherry tomatoes in a container – successfully?” then the answer is yes – with a few small qualifications. Here’s what you need to know about growing your cherry tomato plant in a pot/container.
Growing Cherry Tomato Plants – Soil
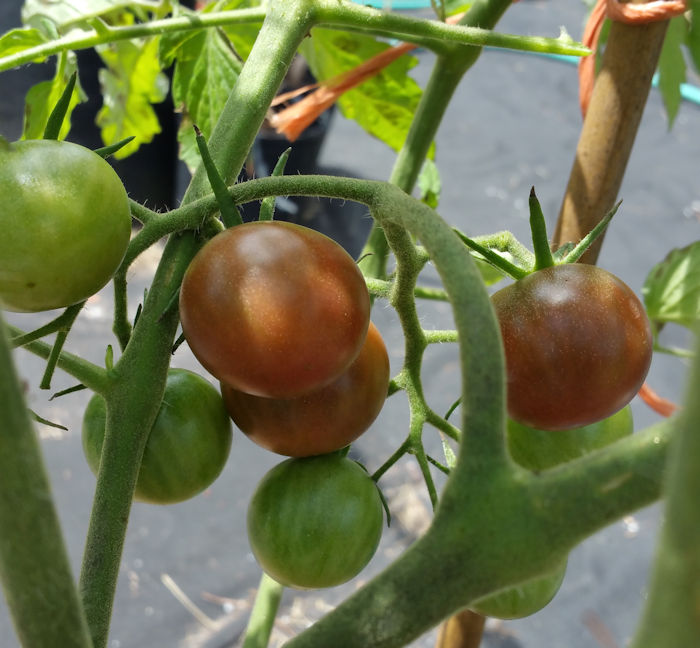
Black Cherry Tomato
First off, growing cherry tomato plants really isn’t any different from growing any other kind of tomato plant. They all need direct sunlight (at least 6 hours a day), water and fertilizer (preferably organic). A good soil to use in the container is a combination of compost and organic potting mix. (I like half and half myself).
I’ve tried growing tomato plants in just compost and in just organic potting soil, but I find that the two mixed together have produced the best growth. Mix in some extra perlite or vermiculite for drainage.
Another option is to use compost mixed in with some sphagnum moss and perlite.
Don’t use soil from your yard in the container; it may compact easily in a container, and it’s quite possible there are unfriendly bacteria in it.
Container Size
What size of a container should you use for your cherry tomatoes? Part of the answer depends on the variety of cherry tomato you plan to grow – determinate or indeterminate. (Learn more about the difference between determinate or indeterminate on the tomato growing terms page.)
In general, determinate varieties are shorter and smaller than indeterminates. Unless you are growing something like Micro-Tom (smallest tomato there is), the minimum size for a container should hold 3 gallons of potting mix/compost. However, if you can manage a 5-gallon container, your tomato plants will thank you by providing more fruit.
Now for the indeterminate cherry tomato plants. While I certainly have grown indeterminate cherry tomatoes in a 5-gallon container, they grow much better in a 10-gallon. (I even have a few 20-gallon pots for the cherry tomato plants that get very large like Blondkopfchen.) So, a 5 gallon container is the minimum, and a 10 gallon will have your plants thanking you. While I haven’t grown SuperSweet 100 in a container (yet!) I think it would work quite well.
Fertilizer for Cherry Tomatoes
The general rule of thumb for container growing is apply half as much fertilizer, twice as often. I like to use liquid fertilizer that I dilute to half-strength, then apply it twice a month.
You need to fertilize more often in containers for two reasons. First, what fertilizer you do use gets washed out from the extra waterings that container plants need. Second, your cherry tomato plant’s roots only have so much room to grow, and sooner or later, they will run out of space. Since they can’t expand further, they need to extract everything they can from a limited area.
Which fertilizer to use? I primarily use organic methods (compost, fish emulsion, kelp meal, Terracycle and Tomatoes Alive!), there are times of extremely rapid growth where I admit to using Miracle-Gro for Tomatoes. While my in-the-ground-garden tomatoes get organic, I find that the container-grown plants do need a little boost at times. Of course, that could be because I am in a hot climate. You’ll have to experiment for yourself.
(You can also check out the posts I made about organic versus chemical fertilizers, as well as fertilizer components.)
Watering Your Cherry Tomato Plants
You really do want to put your containers where you have easy access to water. Especially as they grow larger and the weather gets warmer, you will find that you’ll have to water often. During warm and windy times, I have to water my containers daily — and there have been very dry times where I’ve needed to do it twice a day!
Try to keep the soil moist but not wet. The more of an even moisture level of the soil, the less the chance your tomatoes will crack badly should a heavy rain arise.
A mulch will help to keep moisture in the soil longer. I like to use an inch or two of hay, but I realize not everyone has easy access to it. Other mulches can be bark chips, dried grass clippings, chopped leaves and even shredded paper! (Just make sure the paper doesn’t have colored ink on it.) In addition, some people also swear by red plastic for a mulch.
Can I Grow Cherry Tomatoes in a Container?
By now you see the answer is yes, you can successfully grow and harvest cherry tomatoes in a container. With just a little preparation and attention, you’ll find yourself with tasty snacks that are good for you!
Tomato Cages
If you plan to grow large vining tomato plants, you may want to use tomato cages. What exactly is a tomato cage, though, and how do they work?

Red Beefsteak in a Tomato Cage
What is a Tomato Cage?
A tomato cage is a generic term for a tomato plant support, that supports the plant on at least three sides. A tomato cage can be round, square, rectangular or triangular, although square tends to be the most popular.
Some tomato plants have a vining growth habit, others have loads of fruit, and yet others have huge fruits. And then of course, there are tomato plants that have two or all three of these!
You don’t want tomatoes – plant or fruit – resting on the ground. It’s too easy for insects to find and munch, not to mention plants on the ground are more susceptible to tomato diseases. That means either staking or tomato cages are your best options in most cases.
When to Cage Tomatoes
Many tomato plants can be staked, with one or perhaps two stakes. Then tie the plant’s branches to the stake(s) at various heights so that the plant stays upright.
But there are plants whose growth is too tall or “sprawly”, and they need more support than one or even two stakes. This is where tomato cages can come in handy. (Of course, you can cage any tomato plant you like.)
Determinate tomato plants bear the vast majority of their fruits in a short period of time. These plants can get very top-heavy, and sometimes stakes don’t provide enough safe support for all those ‘maters!
I usually stake most of my tomato plants, but the bigger plants get caged, as I’ve learned through experience. Don’t be like me and have a tomato plant split because the support from the stake just wasn’t enough. Tomato cages give support at multiple points instead of just two or three.
Big Tomato Cages
Pineapple Tomato in a Tomato Tower
There’s another tomato cage that I have just ordered in preparation for The Great Tomato Experiment is the tomato tower with nylon trellis. It’s a larger type of “cage”, rising to 6 feet tall – great for the larger tomato varieties. Which I fully expect to have with the experiment!
I prefer the square cages, but I am open to experimentation. 😀 I do like tall tomato cages, though, and they tend to be harder to find.
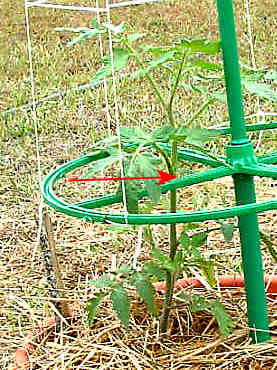
Now there are plenty of tomatoes that can be staked, like the smaller determinate plants. For these tomatoes, you can use a stake or a tomato pen (like the first photo on this page). You’ll want the pen 30 to 40 inches tall, or a stake 3-1/2 feet tall for these varieties.
Hope this gives you enough information on whether you can stake your tomatoes or if you should have tomato cages for them. Either way, enjoy eating your delicious homegrown tomatoes!