Fertilizer
Compost Tea – How to Make It
If you’ve been gardening for awhile (and maybe if you’ve just started), you’ve likely heard about something called “compost tea”. It’s organic, good for your plants and acts as a fertilizer. And while you will have to make it yourself, it’s pretty easy. Want to learn more about this tea — how to make it and how to use it? Read on!
What is Compost Tea?
It’s kind of what it sounds like — a liquid that is created from compost and/or additional ingredients. It can be a “steeped” variety, or a “brewed” variety. They both feed the soil, which in turn feeds the plants. However, they go about that feeding in a different manner.
Depending on what you put into the tea, it can act as a fertilizer, a (good) bacterial/fungal agent, or both. It can be watered in or used as a foliar feeding. Let’s find out what’s needed to make this tea.
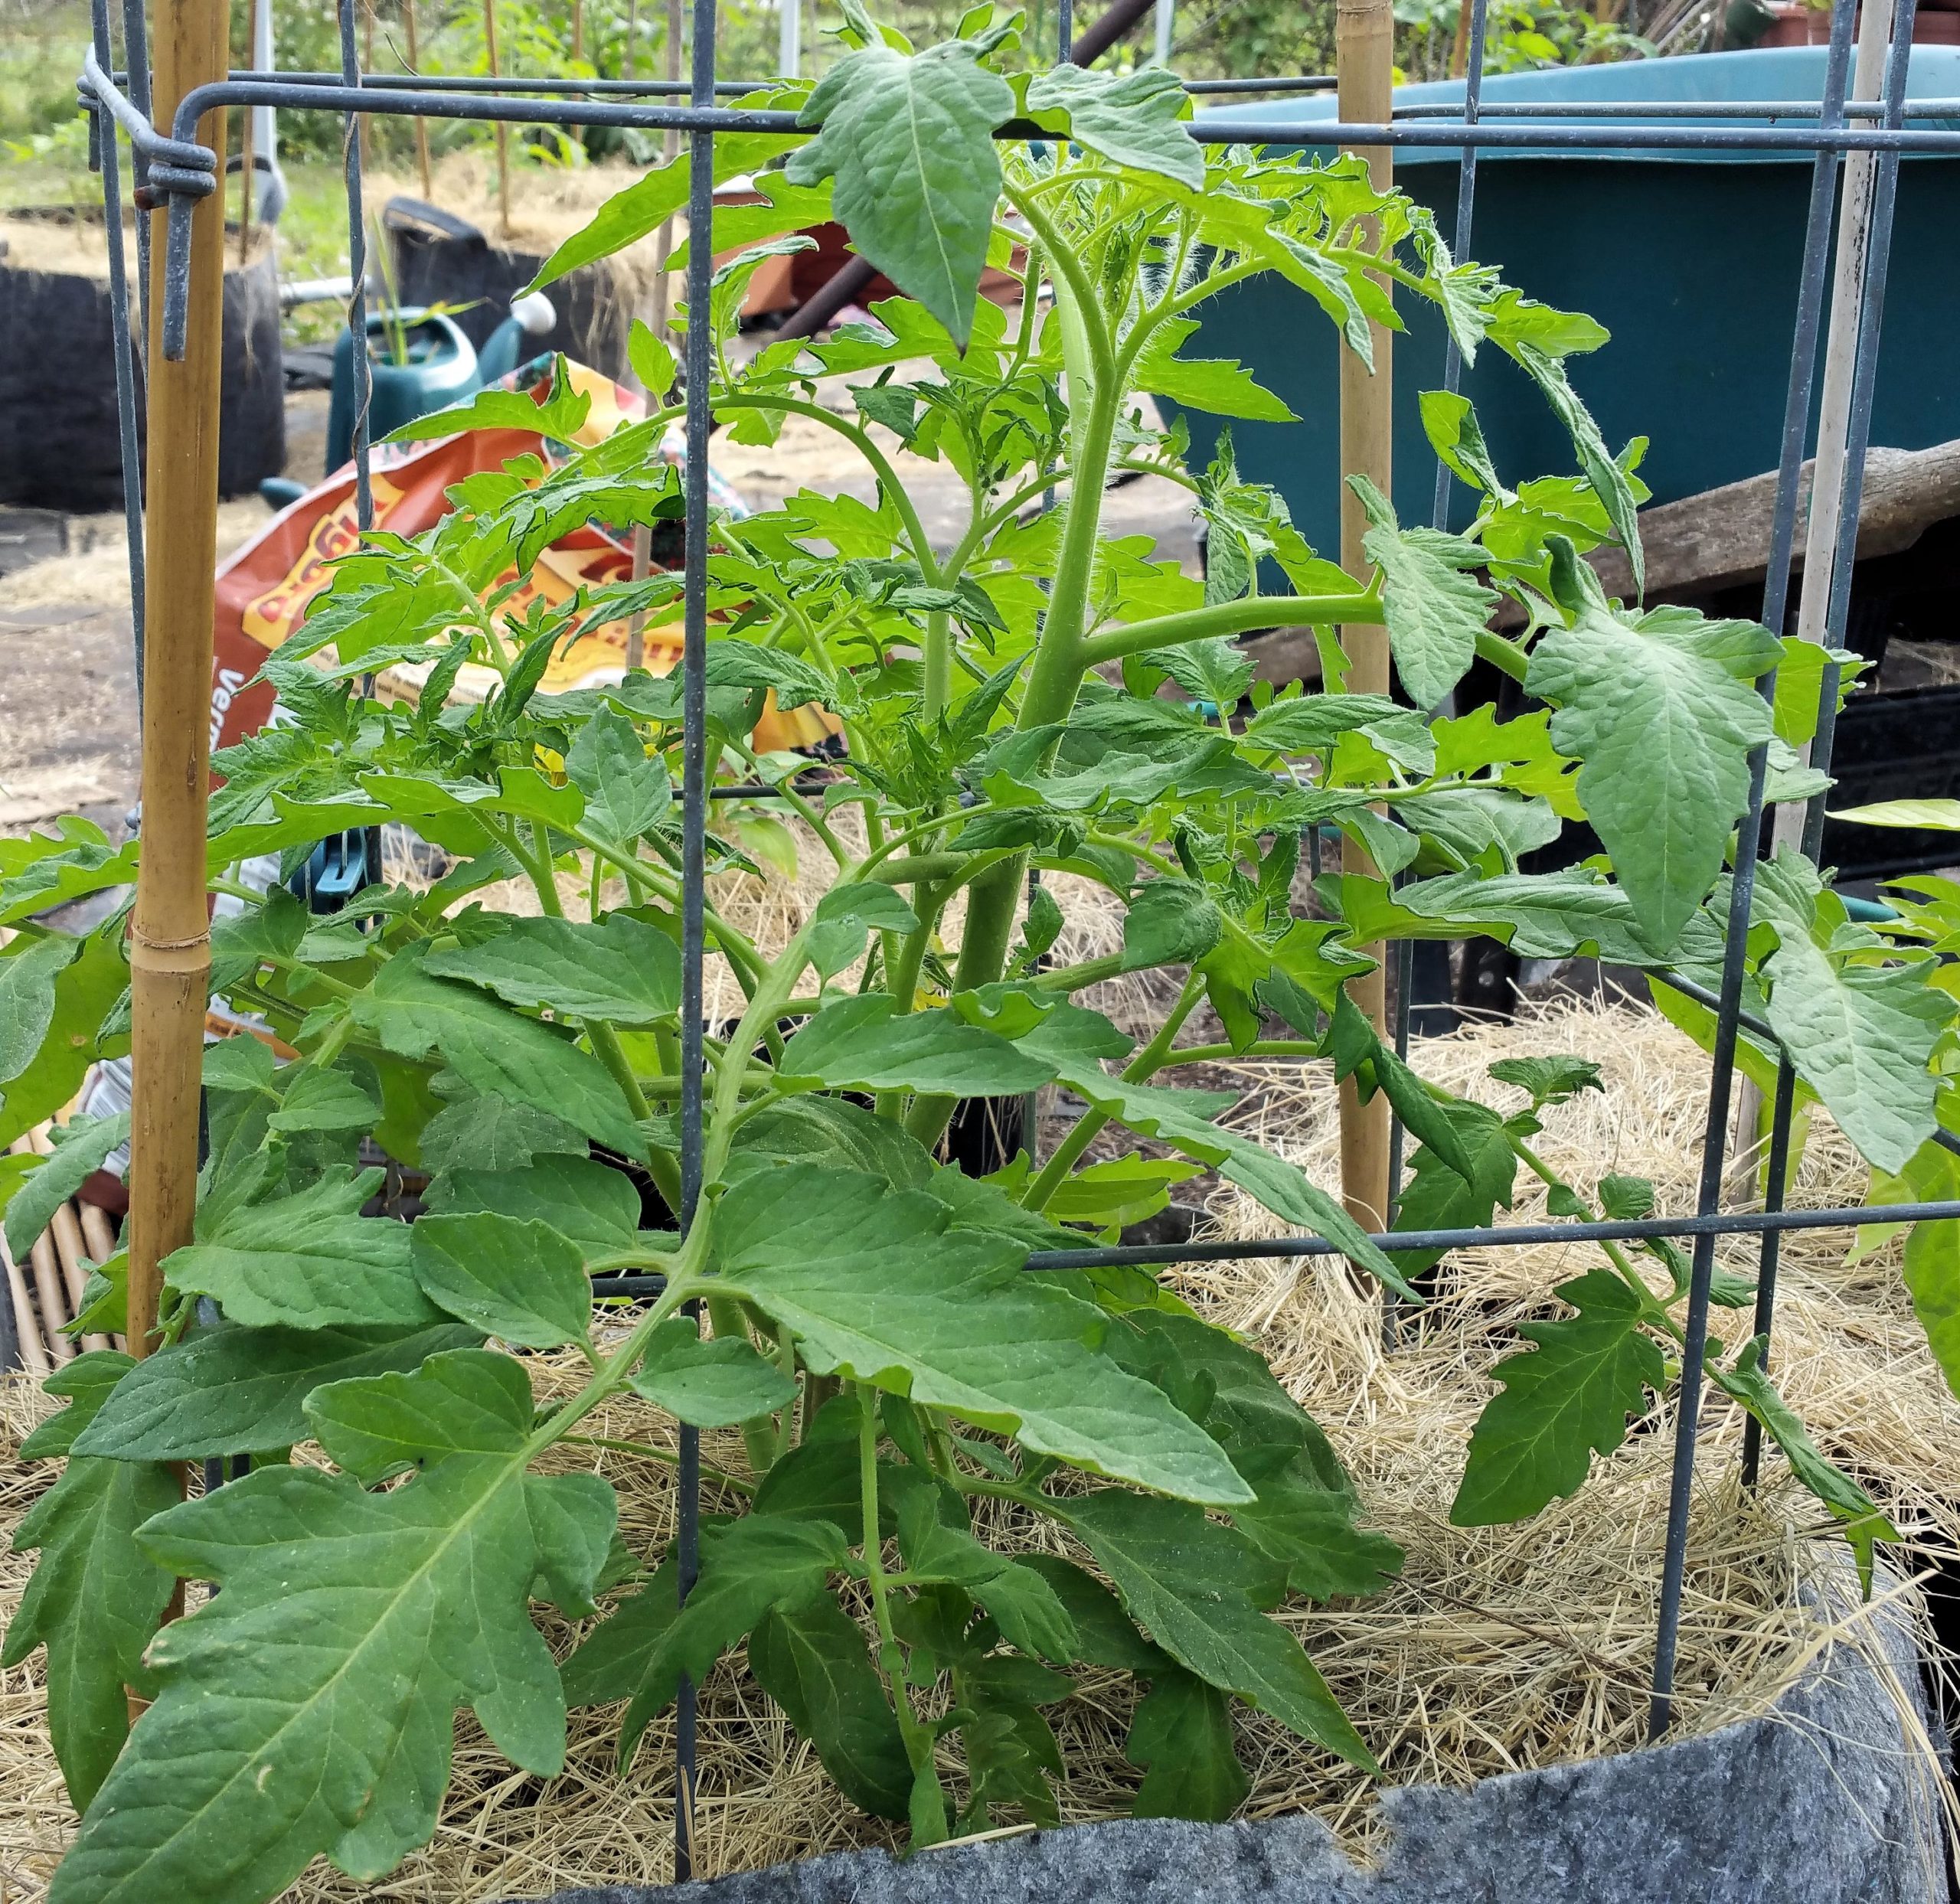
Red Beefsteak Tomato Plant, Before First Compost Tea
(By the way, it’s not only just for tomatoes — all plants can benefit.)
Does it Work?
The first thing you might want to know is — does it really work? From using it myself, I can whole-heartedly agree that it does work. I put off using tea for quite a few years, because I thought it was too much of a pain to make. Turns out it can be very, very simple (or as complex as you want).
Personally, I use the simple method – at least for now. And I have to say that within literally 2 days, I saw a significant change, for the better, in the majority of my plants. Within 4 days, all the plants had responded favorably. In a previous post, I mentioned that one of my tomato plants had doubled in size within a week!
And it’s all organic!
The Steeped Method of Compost Tea
This is super-easy. I make it in 5-gallon buckets, but you can scale it down or up as needed. Here’s how to make it:
- Take a 5-gallon bucket, and into it put one heaping trowel (a small hand shovel) of fresh compost or two heaping trowels of bagged compost.
- Fill the bucket to the top with water.
- Let it sit at least overnight, and even better is 24 hours.
- Use it while watering your plants. First water normally, then add a cup or two of the tea to the base of each plant, depending on the size of the plant.
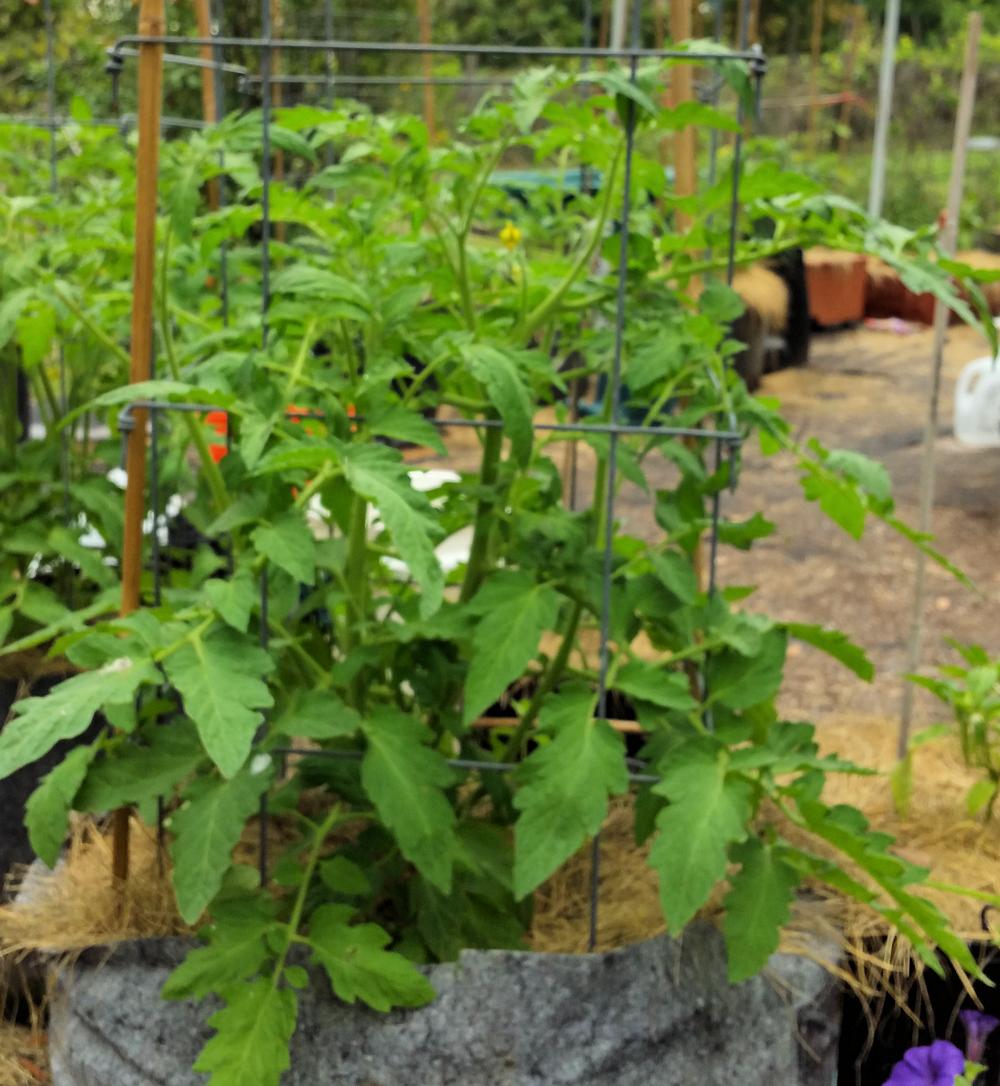
Same Plant, 10 Days After, With 2 Doses of Compost Tea
You can use it immediately, or within a week of making it. Either way, give it a quick stir before you use it. Note: It should look really dark, like coffee or a really strong tea. If yours is more like weak coffee or tea in color, just add some more compost next time.
You can also use worm castings in place of some or all of the compost, or in addition to the compost. And if you like, add in some liquid kelp — maybe a tablespoon or two.
You can use this for foliar if you like, but I think just watering it in works just as well. I used just worm castings for my first two batches, but my next batch will be a half bagged compost and half worm castings (1 trowel bagged compost + 1 trowel worm castings)
The Brewed Method of Tea
It’s a little different, and takes a little more effort. This kind of tea basically encourages good bacteria and fungi by feeding them, and then it is sprayed onto the plants as a foliar or using it as a supplement to watering. There are lots of companies that sell a brew mix that is ready to use, or you can make your own. Either way, the process is pretty much the same.
Use de-chlorinated water. If you have chlorine in your water, either use a chlorine filter or just put water in a bucket and let it sit overnight (or better, 24 hours) to let the chlorine dissipate.
Put together the following in a 5-gallon bucket along with your water:
- 1 trowel of compost (or, worm castings)
- 1 tablespoon of molasses (blackstrap, if you can find it — otherwise regular)
- 1/4 teaspoon humic acid
- 2 tablespoons of liquid kelp
Stir together to mix thoroughly. Then you will need an oxygen source, like an aquarium pump with tubing and an air stone.
With the aquarium pump outside the bucket and the air stone in the bucket (connected to the pump via tubing), run the pump and let the tea brew for at least 4 hours — 8 hours is better.
Use immediately as either a foliar feeding or a cupful after you water your plants. You’ll need to use it quickly, as this doesn’t keep well. If you can’t use it all in one day, you will need to keep the air stone in. to continue the oxygen.
Variations
If the above brewed recipe isn’t quite to your liking, there are quite a few companies that sell a product that is ready to brew. All you need to do is add the de-chlorinated water and air stone, and then brew the length of time recommended in the instructions you receive with the product.
Note: Also follow the directions for how to use the finished tea — some products require you to dilute it further before using it on the plants.
Using Compost Tea
This post is already pretty long, so I’ll do a separate post for how to use compost tea. As soon as I have the post written I will link to it.
Using Fertilizers
Now that you know what makes up fertilizer, the next question might be how to actually use the fertilizer on your tomato plants. Even tomatoes grown organically in rich soil need some help in times of swift growth or when having lots of fruit on the plant.
There are several ways to apply the fertilizer: foliar, liquid and granular. Each has its strengths and weaknesses, which is what I’ll discuss in this post. And in actuality, you may choose two or all three methods at different points in your tomato plant’s life.
Foliar Fertilizer
Foliar fertilizer is sprayed onto your tomato plants and absorbed through the leaves. The absorption rate is swift, and many growers (including me) swear by foliar fertilizing for healthy tomato plants.
Foliar fertilizers in general should be diluted, so that there is no chance of the plant’s leaves being burned. Good bets for organic foliar fertilizers include Terracycle, liquid seaweed and fish emulsion.
The downside for this fertilizing method is that it must be done early in the morning, before the dew dries. This is because that’s when the plant’s stoma are open and receptive. Later on in the day, the stoma are closed, so even if you did a foliar feeding, it wouldn’t be absorbed.
Some people say you can also foliar feed in the evening, when the stoma are once again open. However, I don’t like to leave my tomato leaves damp in the evening because I feel it increases the risk of fungal diseases in my humid climate.
Liquid Fertilizer
Liquid fertilizer is pretty much what it sounds like; a fertilizer diluted in water. Liquids can be used both for foliar feedings as well as drenches (i.e. pouring on the soil around the plants).
If you choose to use the liquid fertilizer as a foliar feeding, dilute to 1/2 the strength suggested on the instructions. If you choose to use it as a drench, give the plants a light watering before applying the drench.
When using a drench, make sure you aren’t splashing any soil up onto the tomato stems or leaves, to reduce the risk of any soil bacteria that may be present from getting on the plants.
Granular Fertilizer
Granular fertilizer is in solid form and generally sprinkled on top of the soil around the tomato plant. Some granular fertilizers can be mixed into the soil before you transplant into your garden or a container.
Granular fertilizers can be time-released, feeding the plant over the course of several months. However, I don’t generally recommend that because the needs of the tomato plant change as the plant gets larger and starts to bear fruit. I feel that a granular fertilizer that is good for one month is more appropriate…unless it is a granular fertilizer made specifically for tomatoes, like Tomatoes Alive!® .
I’m also including solid fertilizers like Jobe’s tomato fertilizer spikes in this category, because they function roughly the same as granular.
Don’t Over-Fertilize
The most common mistake is over-fertilizing the tomato plants. I know, it’s tempting to want the plants to grow big right away, but using a lot of fertilizer isn’t the way to get strong, healthy plants. A lighter touch yields better results.
The exception is if you are growing your tomato plants in containers. Since you need to water them more often, you’ll also need to fertilize them more often. It’s better to use less than you think you need at first, because you can always add more. But if you use too much fertilizer at one time, you risk burning the roots (not a good thing).
I grow a lot of tomatoes in containers, and I find that using a weak (no more than 1/2 strength) more often gives me better results.
Tomato Fertilizer
Tomato fertilizer isn’t just any old thing you see on the shelves of your local garden center. What’s right for other veggies and plants might not be what you want for growing tomatoes. So here’s a quick discussion on the components of fertilizer (what those numbers mean) and how they relate to tomatoes.
Fertilizer Components
Your average plant fertilizer is primarily made up of three components: nitrogen, phosphorus and potassium (N-P-K). While there can be various micronutrients present, the numbers (like 8-3-2) you see on the fertilizer refer to the relative amounts of nitrogen, phosphorus and potassium (in that order). And that’s what this post will discuss.
Nitrogen
Nitrogen is the first number indicating the fertilizer strength, and nitrogen is primarily responsible for foliage — making it strong and healthy. And while the tomato is first growing, that’s exactly what we want — a good strong plant. When just setting out plants into the garden, something along the lines of 10-5-5 is nice — you want the foliage to be plentiful and strong.
Phosphorus
Phosphorus is of interest to tomato growers because it’s a necessary nutrient for plenty of blossoms. Without blossoms, you won’t get tomatoes! After the tomato plant has adjusted to being out in the garden and has plenty of new growth, it’s time to increase the ratio of phosphorus. Now you want more phosphorus than nitrogen (example, 5-10-10).
Potassium
Potassium is used for regulating the water content of a plant; its transpiration. If there isn’t enough potassium available, the plant is more vulnerable to droughts, be they temporary (forgetting to water one day) or longer-lasting. Once the plants are established, something along the lines of 5-10-10 are good.
The Strength of the Numbers
Don’t go thinking the higher the numbers the better — if 5-10-10 is good, then 10-20-20 is great. Not so, as fertilizer that is too strong can burn the roots as they try to develop. I prefer to use a weaker fertilizer with the same relative percentages, and even then, I don’t always use it at full strength. Instead, I prefer to fertilize a little more often; this seems to give me a good balance between feedings and how much the plant can use at a time.
As you’ve probably gathered in my other posts, I prefer to use organic fertilizer wherever possible. In additional to Terracycle and sea kelp, one fertilizer I like to add in is a fish emulsion. Since I can’t seem to find it locally, I get it online and I find that my plants really like it. It’s concentrated, so just a little bit mixed in with some water goes a long way.
Fertilizing Tomato Plants
Fertilizing tomato plants is necessary for optimum growth (both for the plants and the tomatoes). But is there a best way to fertilize? And what about organic fertilizers versus chemical?
Let’s take a look at feeding your tomato plants.
Fertilizing Tomato Plants Organically
Organic fertilizers tend to break down slowly, releasing their nutrients into the soil over time. By “feeding the soil” the plants become stronger and less prone to attack from insects and disease. A good organic approach would be to use a combination of compost, peat, aged manure (or the bagged varieties from the store), and organic amendments such as blood meal and bone meal to create a rich soil.
With this approach, additional fertilizer is usually only necessary only once or twice a season; just after the blossoms appear, and again when a plant is laden with fruit. Good organic fertilizers for this use include fish emulsion, seaweed emulsion, and “manure tea” (fresh manure placed in a large container, filled with water, and allowed to “steep” for about a week). Make sure to dilute any such liquid fertilizer until it is the color of weak tea; even organic fertilizers can “fry” plants if applied too strong!
The organic method of gardening also benefits the environment by not adding chemicals that can upset the balance of nature. We’ve all read about how these chemicals can harm wildlife, not to mention ourselves when they infiltrate the water system. Chemical fertilizers work quickly, but they also leach out of the soil quickly.
Using Chemical Fertilizers
Having made the pitch for the organic method, I realize that not everyone is comfortable using organic methods yet. I do urge you to give the matter some thought, but if you much use chemical fertilizers, here are some general rules:
Fertilizer strength is measured by the percentage of nitrogen, phosphorus and potassium (N-P-K) to inert ingredients. For example, 6-6-6 means there is 6 lbs. of nitrogen, 6 lbs. of phosphorus and 6 lbs. of potassium per 100 lbs of fertilizer. A mixture of 4-12-6 would mean 4 lbs. of nitrogen, 12 of phosphorus and 6 of potassium per 100 lbs.
Look for fertilizers with a higher phosphorus (middle) number. Phosphorus is what fuels the production of flowers, and flowers are how fruits are formed. Try to make it a relatively balanced mix (5-10-5 would be ok, 5-10-8 would be better). You might try Miracle Grow for Roses (you read that right, roses), and use it at 3/4 strength.
Don’t use a “bloom booster” fertilizer with a super-high phosphorus count and really low on nitrogen and potassium. You might be favoring blooms, but your tomatoes may fail to develop properly later on, because the leaves and roots didn’t get enough of what they need.
Do not use a high nitrogen fertilizer! You’ll be sacrificing fruits for leaf growth!
Do not fall into the trap of thinking “If a little fertilizer is good, more is even better!” Wrong! Too much fertilizer can kill the plants. It’s much better to use the fertilizer at 1/2 strength and fertilize a little more often.
Organic + Chemical
Yes, you can mix organic and chemical fertilizers, and in fact I often do. I amend my soil with plenty of compost & manure, then add kelp meal, bone meal and blood meal. A little fish and/or seaweed emulsion finishes it off.
However, I like to add some of the Miracle Grow for Roses (2/3 strength) at the time the blossoms are starting to open, just to give the plants a little extra “snack”. I might give a little extra (1/2 strength) if the plants have a heavy tomato load.
That’s what I do — you are free to use whatever fertilizers you’d like, for your own circumstances.
Additional Reading
Now that you’ve learned about fertilizers, you might want to know about tomato insects and tomato diseases. Be prepared!