Growing Tomatoes
Growing Tomatoes in South Florida
Growing tomatoes in South Florida seems like it would be easy, right? Lots of sunshine, plenty of rain. That’s good, but what isn’t is the evil twins of high heat and high humidity. In the summer, anyway. Let’s talk about growing tomatoes in South Florida.
Seasons in the Sun
Better Bush Tomatoes
For the most part, we don’t have much in the way of freezing weather here in South Florida. Sure, we do get cold snaps in the winter, and we do see the occasional frosts and freezes, but for the most part, winter is mild for the plants. If you’re able to cover your tomato plants when a frost hits, there’s a good chance it will survive.
From about late January through the end of April is our prime growing season, give or take a week or two in either direction. It’s basically mimicking what happens in the more northerly parts of the county – just several months earlier.
Our secondary growing season is from about the middle of August through to about Thanksgiving. We start out really hot, and it doesn’t start cooling down until around late September. However, by then the tomato plants are in flower and have less of an issue with setting fruit.
So….what about Summer?
Summer and the Evil Twins
It’s hot here. It’s humid. There are tons of insects. What’s not to like? 😉
Seriously, while tomato plants like the heat, they don’t like humidity — at least, not for months at a time. Our nighttime lows are the summertime highs in other parts of the country. And that is the big problem.
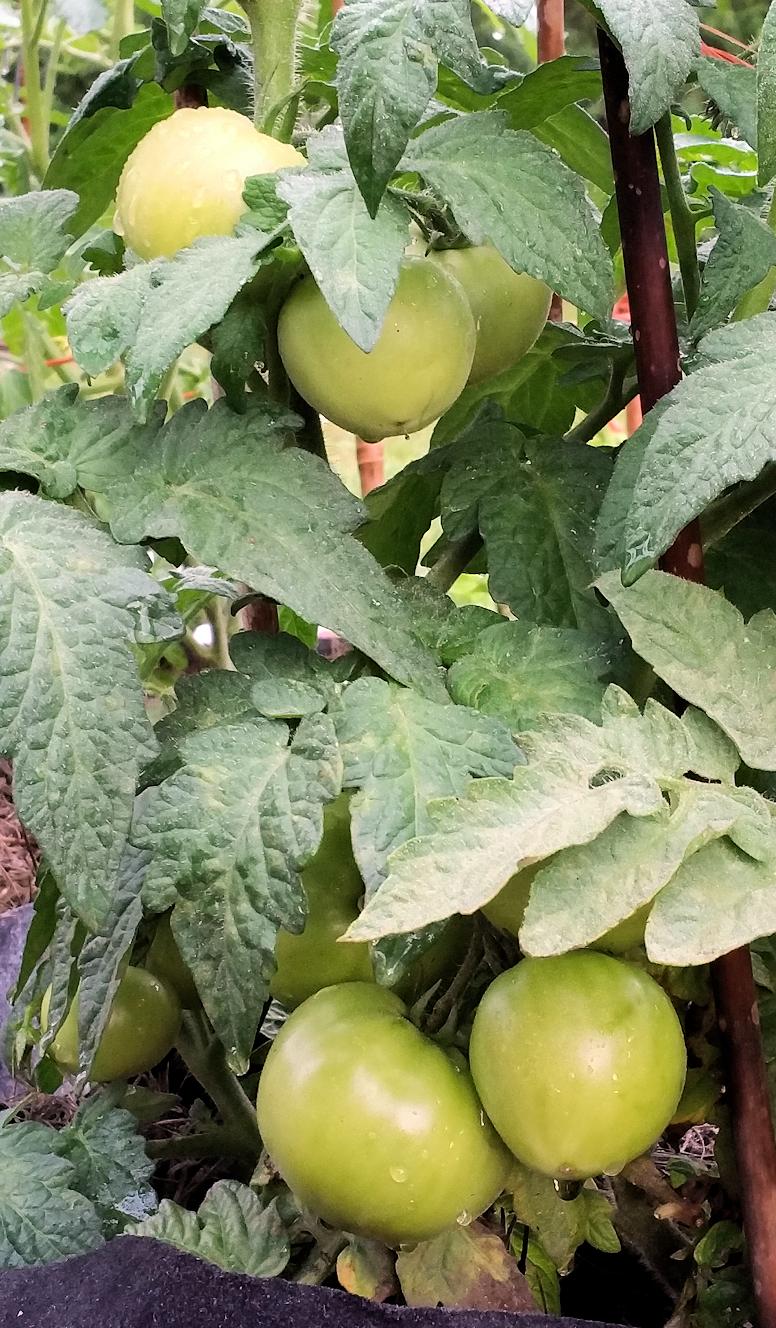
Tomatoes – most varieties that is – don’t set fruit well in high sustained heat, especially when they don’t get a chance to cool off at night. The large-fruited varieties are especially prone to either dropping their flowers, or not flowering at all when it gets really hot.
The humidity takes a toll as well. Various kinds of tomato blights thrive in humid weather; the bacteria and fungus move in and the leaves start turning yellow and brown or black spots – yuck!
Now, this isn’t to say that you can’t grow tomatoes in South Florida in the summer — just that it is way more challenging.
Tomato Varieties for South Florida
In the late winter through mid-spring growing season, you can grow just about any variety. Peruse the catalogs and online stores for intriguing tomatoes. Just remember that if you plan to grow your plants from seeds, you need to plant those seeds (indoors) around the beginning of December. (I have a video that I’m finishing up that talks about planting seeds; I’ll post that here when I have it ready.)
Alternately, if you’re like me in some years, you can purchase your starts from a nursery or big box store and transplant them into the garden. I tend to do a little of each, LOL.
Either way, your best bet is to get them into your garden by the middle to end of February.
Some larger-fruited varieties I have grown successfully include Kellog’s Breakfast, Cherokee Purple, Black Krim, Pineapple and Red Beefsteak. Other varieties I like are Better Bush, Eva Purple Ball, Loxahatchee, Black Prince and Druzba.
I’ve also grown Pink Brandywine — the only issue I have with it is a low production; I don’t get all that many tomatoes (although the ones I do get can be huge).
Of course I’ve grown far more than just the ones I’ve listed — these are just the ones that stand out in my memory. Wait — what about cherry tomatoes?
Cherry Tomatoes
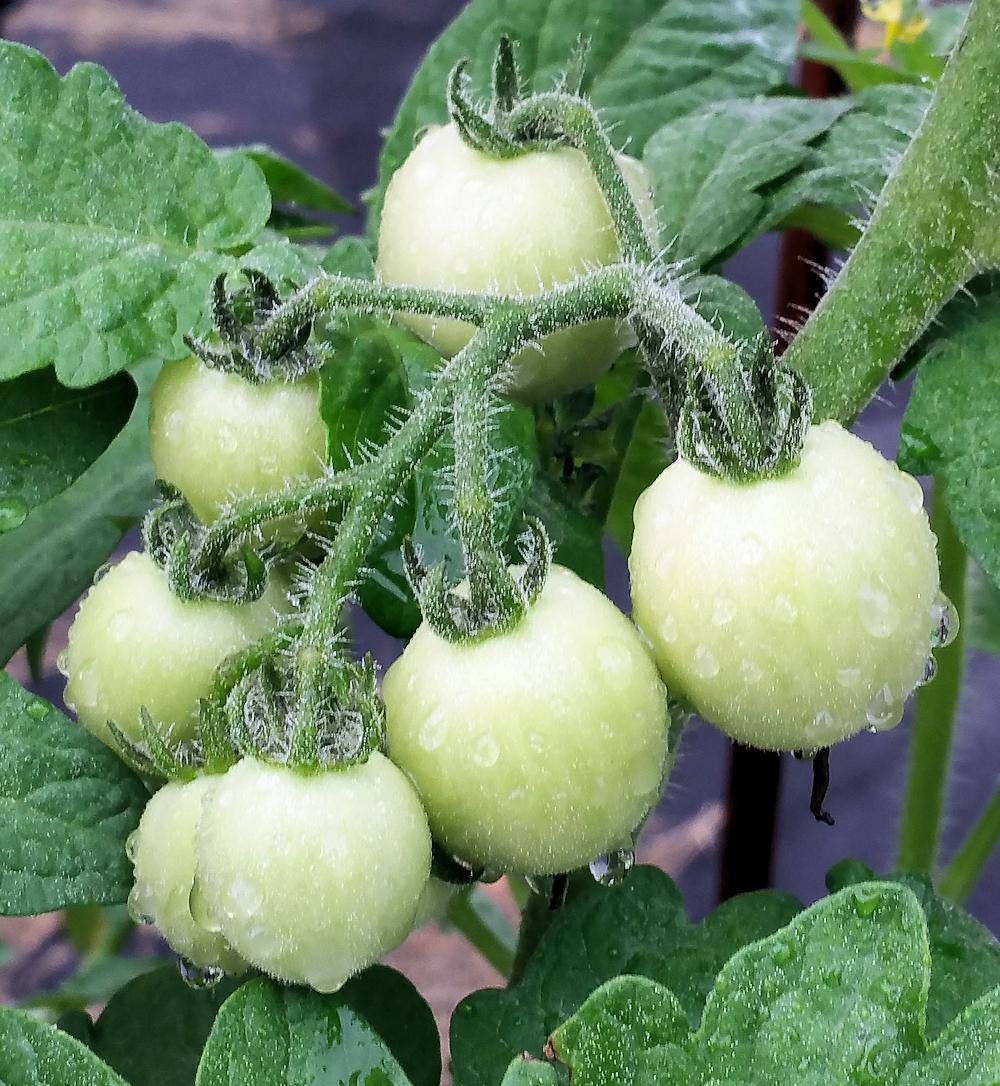
Husky Cherry Red
These are the saving grace for those of us who are homegrown-tomato-starved during the summer (and all year around, actually). Cherry tomatoes tend to still produce during the high heat and humidity. Maybe not as much as during the cooler parts of the year, but you can still grow them.
I’ve grown all sorts of cherry tomatoes, including Black Cherry, Husky Cherry Red, Isis Candy, SuperSweet 100, and Juliet to name a few. It’s getting to be late March, and I am still planting cherry tomato seeds for summertime snacking and salads. This summer I am going to try Indigo Cherry Drops and Rapunzel. I’m also going to try to keep my existing varieties (Isis Candy, Black Cherry, Juliet and Husky Cherry Red) growing.
Native Soil in South Florida
Can you say “terrible” (except for the area around Lake Okeechobee)? It’s sandy before you hit a hardpan of clay, and devoid of nutrients. The only way you can deal with it is to incorporate a lot of compost. And I do mean a lot — when I was doing in-ground gardening, I easily used 80 bags of compost when I got started. Fortunately, every year your soil will get better and better with the compost, and you will only need to add smaller amounts.
Your other options are raised beds or container gardening.
Insects
One last word is about insects. Tomato hornworms can decimate a good-sized plant overnight, and we get plenty here. Aphids can also be a problem. Fire ants are also issues (oh how I hate them!).
Nematodes can be a problem. Marigolds planted among your tomatoes will help with that. Or, do as I did — I moved everything to containers.
In the warmer, wetter parts of the year, you’ll also need to allow for mosquitoes. The tomatoes won’t suffer from them, but you will! You can’t get rid of them, but you can try to keep your garden dry (no standing water) as well as strategically place some plants that mosquitoes tend to not like around your garden. This year, I got some lemongrass cuttings and put them in 3 gallon pots. When they root and start growing well, I will transplant them to 5 or 7 gallon containers and move them around in the garden. We’ll see if it works!
Gardening Must Have – Mulch
Tomatoes like well-drained soil, and they generally like it to be moist, but not wet. However, they also need to keep their leaves dry, so as to keep soil-borne bacteria off them. Tomatoes also don’t like to keep bouncing back and forth between dry and wet – especially when they are fruiting.
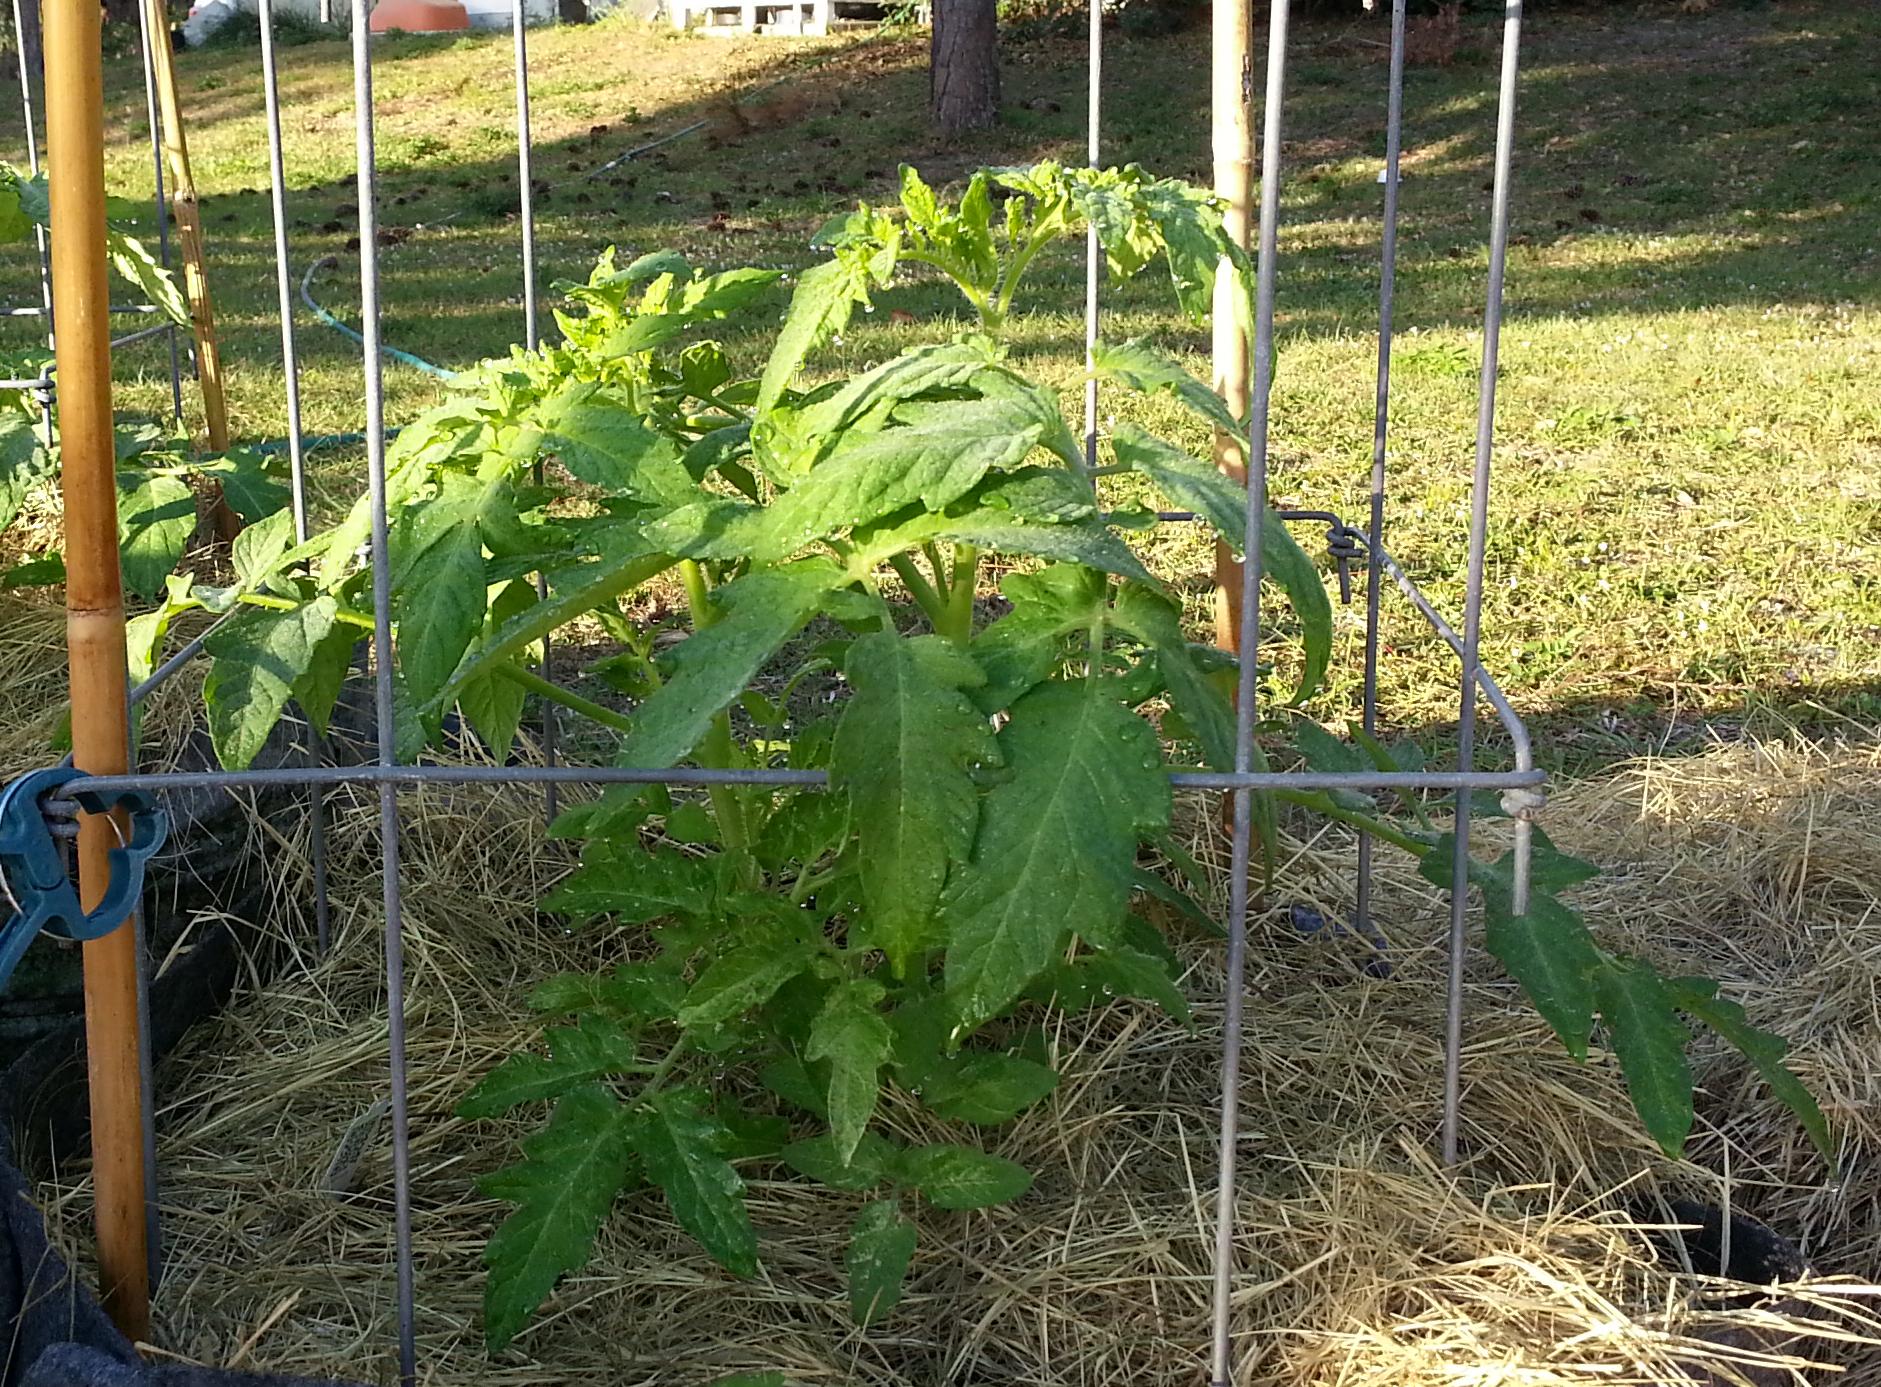
Red Beefsteak Mulched With Hay
Growing tomatoes in containers make all the above a little more difficult, especially in the summer when it’s hot. But there is a way to help keep the soil more evenly moist, not to mention help to keep the leaves dry.
Mulch is a Gardening Must-Have
Mulch is an excellent idea for all kinds of gardening, both traditional in-ground as well as raised beds and containers. It serves to cut down on weeds, keep the roots cool in the summer and also helps to keep the soil more evenly moist. And of course, it keeps soil off the leaves of the plants, which helps to keep them healthier.
Kinds of Mulch
There are all kinds of mulching material. Some of the most popular are:
- Hay or Straw
- Landscape Cloth
- Wood Chips
- Newspaper or Cardboard
Each has pros and cons, and it all depends on your needs and your wallet as to which is best for your garden. Let’s take a look at them.
Hay and/or Straw: This is a relatively inexpensive option; where I live, a bale of decent hay is about $9, and that covers all my containers with a thick layer of mulch. It’s also a great filler for my large 20 and 25 gallon containers — they use a lot of potting mix, and by putting a layer three or four inches thick at the bottom allows for additional drainage and less potting mix. Not to mention it eventually composts down itself. The biggest con is that if you have a small container garden, a bale of hay will be way too much for you to use up.
Landscape Cloth: This is a nice option if you like a clean look to your garden. It comes in rolls that are 3 or 4 feet wide, and anywhere from 50 to 300 feet long. Look for landscape cloth that is permeable — it lets water through — and check to see if it’s at least a “15 year” ground cloth. Not that it will actually last 15 years, but you should be able to get several years from it — I have some that is 4 years old and still going strong. The biggest con is that you also need to weight down the cloth somehow. The best way is to use earth staples — U-shaped thick metal wire usually about 6 inches long. You’ll need to “staple” the cloth into the ground every 6 to 12 inches. Kind of a pain, but once you have it in, it’s pretty maintenance-free. I use it mainly for weed suppression around the garden, but you can cut an X in the cloth, peel back the edges and plant your tomatoes in the soil. Just don’t put earth staples near the roots!
Wood Chips: This is the mulch you see at the big box stores, in the large bags. Inexpensive, so if you have a large area to cover, it can be fairly economical. Just be careful you don’t get the really big chips, as they are better for things like trees — and they also tend to attract bugs. The smaller chips or shredded ones are better for the veggies, and there is less of a bug issue. Don’t choose the ones that are colored — yes, the colored chips are pretty but the fewer extra chemicals in the garden, the better. And of course, wood chips eventually do compost down after a few years. I used wood chips way back in the beginning of my gardening, but I like to go barefoot, and wood chips were uncomfortable to walk on (since I also used them for weed suppression in addition for mulching the ‘maters).
Newspaper or Cardboard: If you have a small container garden, this may be your least expensive option. For a container garden, I would suggest you shred your newspaper (all but the shiny insert pages) and use it that way. For a traditional garden, you can lay out sheets — I suggest at least three sheets thick. You can also use cardboard, but it’s better for weed suppression (unless you have some thin cardboard — then use it like newspaper). Very inexpensive. The only issue is that if you use sheets, you will need to weight them down, at least until they start integrating (i.e. discomposing) with the soil. No newspaper? Yep, use regular printer paper, or even your shredded bills — put ’em to use!
Whatever Mulch You Choose…
…use it! Here’s the way I use it, to help keep the soil moist. Water the plants about half as much as usual, then add the mulch. Finish by watering in some more, wetting the mulch thoroughly. I water the plants less often, but when I do, I water them deeply. My goal is to have my plants get a nice deep root system, so that they are less susceptible to drying out. And the bonus is that I don’t have to water every day, unless it’s extremely hot and there hasn’t been any rain.
A week or so after the initial mulching, I like to add a little more, and again, water it in. I also trim back the bottom leaves, so that none are resting directly on the mulch.
Choose the mulch best for you!
Hybrid Tomatoes, a Few Weeks Later
It’s my first report on my hybrid tomatoes (see the original post here at hybrid tomato experiment). So how are all the plants doing? Well, there’s good news and bad news — here’s what’s happening.
I planted 8 F2 seeds, and all sprouted — good news so far, especially since they looked pretty good. Too bad it didn’t stay that way! (On the other hand, that’s the reason for experiments — you never know what will happen.)
Of my original 8 seedlings, four have survived. OK, 6 survived, but two of them were growing only so-so. Since I want plants that thrive, I pulled ‘em up and tossed them. Yes, it seems harsh, but I don’t need plants that don’t do well for me.
Hybrid Tomatoes That Survived
Of the four plants that have grown well, two are determinates, one is indeterminate and the other seems almost between the two — like a stocky indeterminate.
One of the determinates, plus the one that’s a definite indeterminate, have flowers — a good sign! So these two are in the running for keeping seeds from the tomatoes they produce. But does that mean that the other two don’t have a chance (except for eating what they produce)?
No, part of this experiment is on how they grow and how soon they produce, but the other part is the actual fruit — how large the tomatoes and even more important — how they taste. There’s really no reason to grow tomatoes that are bland or mushy in texture. So earliness is only part of the reason to grow a variety.
I also live in a very hot and humid place — it’s only April, but it’s been over 90 degrees several times already this season. So any plant that can grow and produce fruit in my location gets an automatic vote for keeping seeds from it.
Stay tuned!
Hybrid Tomato Experiment
This year in my tomato garden instead of growing heirloom tomatoes, I am growing all hybrid tomatoes. So why the change? It’s because I’m doing hybrid tomato experiment. Let’s see what’s going on.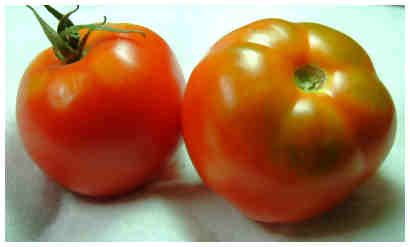
A Review of Hybrid Tomatoes
So what is a hybrid? A hybrid is a plant that has two different parents. For example one parent can be a red tomato and the other parent can be one colored yellow. In my particular case I have a tomato plants that had two very different parents. One parent was a white tomato, and the other parent was a red tomato.
How do I know this? It’s because I have a packet of seeds for a white determinate tomato, and from that packet I got a plant that was an indeterminate red tomato. This means that my red tomato was a hybrid. An accidental hybrid probably, but it’s a hybrid nonetheless.
The F1 Generation
That red tomato that grew from a packet of white tomato seeds, was an F1 hybrid. But what is an F1 hybrid? It’s the first generation from a cross between two different parent plants.
Since I grew out more seeds from that particular packet and I got white determinate tomatoes, I suspected that my red tomato was F1 hybrid. However, I would not know that until I planted seeds from those red tomatoes. (The photo is of two of the fruits off the F1 plant.)
This year I planted eight seeds from the red tomato plant. And what did I get? I’ve got both indeterminate and determinate plants. This means that my red tomato was indeed an F1 hybrid cross.
The F2 Generation
My eight little plants growing this year are the F2 generation. These are the progeny of my F1 plant. What can I expect to get? Determinate and indeterminate certainly, but what about tomato size and color? That’s where things get interesting.
When it comes to tomato genetics, the color red is dominant over any other color. This means that I will undoubtedly get red tomatoes, can I expect any other color?
It’s hard to say. I might get some white determinate tomatoes, but with only eight seeds planted the chances are slim. That isn’t to say that I won’t get lucky!
My F1 plant had red tomatoes that were been 3 and 5 ounces each in size. However the white determinate tomatoes that I planted, had fruit that were about 7 ounces each. My hope is that I can get some nice red tomatoes in the 6 ounce size range.
As for the determinate plants that I have growing, I expect they will be red. However, you never know what kind of colors might show up; after all, this is a hybrid! And I have no idea what that red tomato was crossed with. The only thing I know for sure is that it was a determinant.
So stay with me, and we’ll see what these plants turn out to be. But I’ll keep you posted through the growing season. It certainly will be an interesting hybrid experiment!
Black Prince Tomato
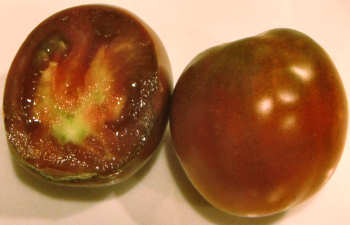
Black Prince Tomato, Sliced
The Black Prince tomato variety is a bit on the unusual side. First, it’s a very different shade — neither red nor black.
Next, it’s more of an oval shape, instead of round or beefsteak or even the standard “paste tomato” shape.
The picture you see here is one Black Prince tomato that’s pretty well ripe; you can see that it’s more of a mahogany color, rather than red or black.
The shape isn’t showing really well in this photo; it kind of looks like an oxheart shape, and it’s not.
The Black Prince variety is an heirloom tomato and comes to us from Russia, so it’s a fairly early tomato. In my Fall garden, it was the first to ripen fruits.
The plant itself is a little on the wimpy side, without a lot of leaves or stems. However, I have been impressed with the yield, which has been very nice indeed
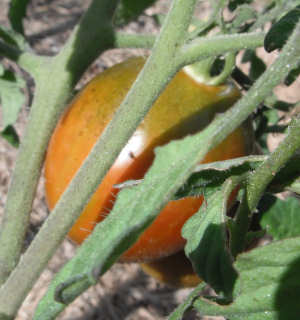
Black Prince Tomato, Not Quite Ripe
How about a photo of one that’s still on the vine (albeit not quite ripe yet)?
This is in the sunshine, so the color is lighter, and once again, it’s not ripe. You might notice that it has “green shoulders” at the moment — the green mostly disappears as it gets fully ripe, but a greenish cast does remain.
Black Prince — Tomato Eating Time!
Here’s the big question…how does Black Prince taste?
I’m happy to say that the taste is very good. While some people say black tomatoes taste “smokey”, I didn’t find that to be true. Instead, it was a rich tomato taste – yum!
The flesh is a little soft, as with most varieties of black tomatoes, but reasonably firm nonetheless. There is a good mix of juice and flesh — not a dry tomato at all!
I’m glad that I grew Black Prince seeds in my Fall garden, and I look forward to a continued harvest, until frost (probably January for me).