Frost and Tomatoes
Getting an unexpected frost can be a sad thing if you have tomatoes out in the garden. Sometimes trying to cover them up just doesn’t work.
So what do you do when life hands you frosted tomatoes?
Know Your Zone
Do you know what USDA plant hardiness zone you live in? It gives you an idea of the kinds of plants you can easily (at least relatively easy) grow. If you don’t know, check out this interactive USDA zone map.
Alas, even when you know your zone (example, I am in 10a), you can still get unexpected frosts and freezes, which can wreak havoc on your tomato plants! Unfortunately, I got a freeze last week and totally lost 3 of the plants. Three pretty much survived and one is iffy.
So what happens when you have a freeze, your plants die but you still have green tomatoes on them? My favorite recipe is green tomato pie — very yummy.
Unfortunately, I don’t have enough green tomatoes to make that pie. But fortunately, the three plants that did survive all have some tomatoes. Not sure why they survived when the others didn’t, but I am grateful.
Meanwhile…
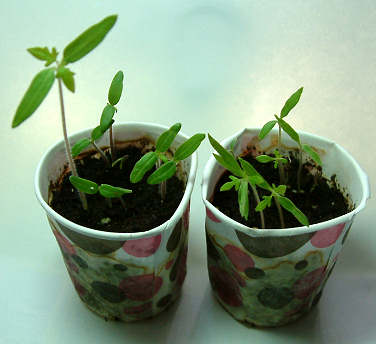
Fortunately the weather has warmed up and I seriously doubt we will be getting another frost/freeze this winter. I have some seedlings that went out in the garden yesterday — they were getting awfully big on the windowsill. And I still have more that I am hardening off — including the three plants for The Great Tomato Experiment.
Maybe the moral of this story is to have “back-up” plants if you get an unexpected freeze after you’ve put your tomato plants out in the garden. Seedlings that you started a couple weeks later, maybe. That way if the worst happens and you lose most of your crop, then at least you’ll have a few to restart.
Worm Composting
Worm composting is a way to generate worm castings. Why do you want to add worm castings to your tomatoes? Because they organically feed both the plants and the soil.
What Exactly is Worm Composting?
Worm composting is also known as vermicomposting, it’s a somewhat unusual way to recycle your kitchen scraps.
Basically, the worms eat the scraps, and after they have digested it, excrete the “leftovers”. These leftovers are called castings and they are a superb soil conditioner and plant fertilizer. Worms are amazing; they can eat almost their own body weight a day. Naturally you won’t have just a few worms; 500 is a good number to start with. More if you generate a lot of kitchen scraps every day.
Where Can You Vermicompost?
Worm composting can be done anywhere where the temperature is moderate and the bin isn’t in direct sunlight (in warm climates). You don’t want to cook your worms!
The best temperature for your hard-working worms is between 55 and 70 degrees Fahrenheit. You don’t want the bin temperature to go below 50 or over 88 degrees Fahrenheit. This may mean you need to put the bin inside your home in a spare corner. Not to worry, once your worms have settled in and started munching, there is no smell, providing you haven’t overloaded the tray with scraps.
Getting Started with Worm Composting
To get started with worm composting, you’ll need some trays, bedding and (naturally) worms. Red wrigglers are the best worms for vermicomposting. To get some of these hard-working worms, you can try a local bait shop. No bait shop nearby? You can order them online, to be shipped to you.
Check with a gardening center to see if they have worm composting trays. If they don’t, you can easily order them online. You’ll want at least a 3-tray system, with 4 or 5 trays even better.
The worm bedding can be anything organic, like coir, shredded newspaper (black and white only; no color printing), sawdust, hay, dried leaves — anything to mimic the worm’s natural environment. The bedding should be very slightly moist, but not soggy or wet.
Add the kitchen scraps (shredded or chopped a bit so they are easier for the worms to eat) and let the worms have at it!
You might have an organic garden shop near to you that carries worm composting supplies; if you do — great! Get your trays, worms and bedding and you’re all set.
If you don’t have anywhere locally to get your worms or supplies, check out some online worm composting kits.
Why Do Worm Composting?
Why vermicompost? Because your plants love worm castings! I’m not sure what about the castings make the tomato plants so happy, but it does. But if you can’t (or don’t want to) do any worm composting, you can buy some worm castings. If you can’t find the castings locally, here’s where I get mine.
Here’s to your composting success, however you get your castings!
Green Tomatoes Anyone?
I went out a little while ago to check on the tomato plants. The weather has been quite unsettled lately, so I wanted to check and make sure everyone was doing OK.
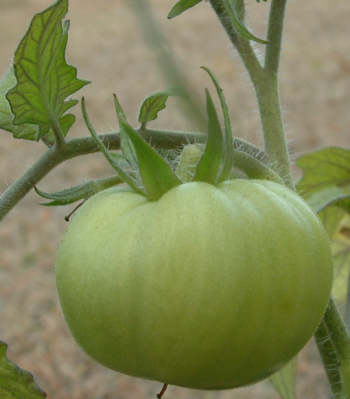
Celebrity Hybrid Tomato
I brought my camera out with me, and I shot a few pictures of a few of my tomatoes-to-be. Some are (I think) getting ready to ripen, others are “newborn”. Normally I would have had something ready to eat by now, but we’ve had a colder than normal winter so far. And when the weather is cooler, the slower the tomatoes mature.
Celebrity is the first of the tomatoes I got my photo op with. It’s actually Bush Celebrity, but has been acting a little more like an indeterminate of late; guess it’s due to the weather. The tomato in the photo gets a bit larger each day, and I know one day it will be ready to pluck. Nice shape, though, and blemish-free.
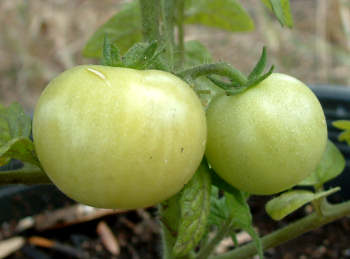
Husky Red Cherry
Next up is Husky Red Cherry. The two tomatoes in the photo have looked like this for the last month now; no size change. It’s only been in the last day or two that I think the color has barely started to change — it’s not quite so green as it had been. Lots of tiny new cherry tomatoes, but these two are the closest to being grown. If they don’t do anything soon, I may consider a doll-sized green tomato pie…
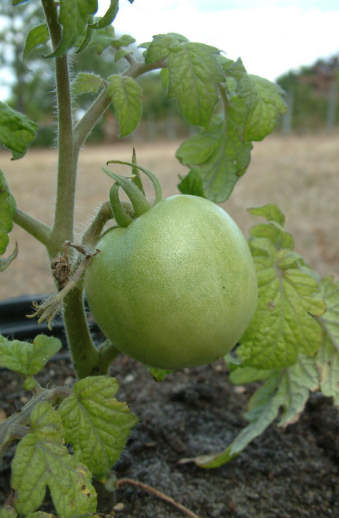
Patio Tomato
Patio has finally quit growing (the tomato that is) and so I’m waiting for it to start changing colors. Then again, it may (again) just be the weather. This particular plant has been less than generous with its flowers and fruits, although I am seeing a bunch of new flowers just starting to be formed.
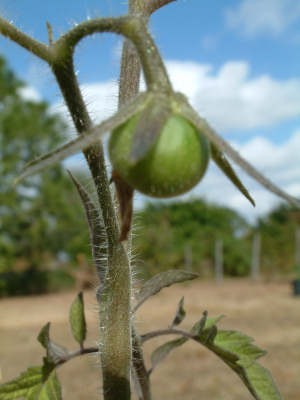
Baby Tigerella Tomato
The last for the day is the newborn Tigerella tomato. Just about the size of a blueberry, it’s the first one on this heirloom tomato plant. Lots more blooms, though, so hopefully production will start ramping up.
Like I said, with the weather unsettled, the tomatoes aren’t at their best. I’ve even had to bring in most of the seedlings that I had been hardening off, to wait for better weather. Well, growing tomatoes in South Florida in the winter isn’t a whole lot different from growing in the spring further north. At least, not this year.
Tomato Plants or Seeds?
Should you buy tomato plants or grow from seeds? There are some good arguments both ways, and I sometimes do both. Let’s look at the advantages and disadvantages of each.
Buying Tomato Plants
There are two main things you need to be concerned with, when buying tomato plants for your garden.
- First, how do the plants look? Are they rangy and tall, shorter and bushier or somewhere in between? The taller rangy plants are not as desirable as the stockier plants. The taller plants may have been fed a bunch of fertilizer, or haven’t been given enough sunlight, producing the rangy growth.
- Can you see any roots showing at the bottom or sides of the pot? If so, the plant is very likely root-bound and will have trouble getting started in your garden.
Also be careful of the following when buying tomato plants:
- Do not, no matter how tempting, buy plants that already have open blossoms or tomatoes. These plants will be shocked moving into your garden and very likely will have setbacks (take it from someone who knows).
- If the plants come with little removable plant labels, you may (or may not) get the variety that you’re expecting. Charles Wilber tells a story about thinking he was buying Better Boy plants (beefsteak tomatoes) and ended up with cherry tomatoes — someone had either mislabeled or switched labels. (However, with those cherry tomatoes, he captured a Guinness world record for the largest tomato plant, so all ended well.)
The main advantage to buying tomato plants is that the early work is already done. If you decide late in the season that you want to grow tomatoes, there may not be time to start from seeds — and the plants fill in nicely. Also, some people don’t want to be bothered with starting seeds. These are cases where buying tomato plants works well.
Tomato Seedlings
Planting Tomato Seeds
Planting tomato seeds gives you the most variety and control over your tomatoes. In general, tomato plants are available in maybe a dozen varieties. Tomato seeds, on the other hand, have thousands of varieties from which to choose!
Sometimes you’ll find heirloom tomatoes as plants (I found Tigerella at the local Home Depot garden shop), but most plants available are hybrids.
If you want a wide range from which to choose, you can try Amazon (of all places) . Yes, I do buy some of mine there, thus far with great success.
The biggest disadvantage of planting your own tomato seeds is that you have to do it well before the time you need to put them out in the garden — in general, 4 to 6 weeks ahead. Also, you need to have a warm dark place to germinate the seeds, then some place to put them where they will get adequate light after they’ve germinated.
I tend to germinate far more seeds than I do buy tomato plants, partly because there isn’t enough of a variety available locally for the plants. I also like to grow organically as possible, and it’s highly likely that store-bought tomato plants will have been fertilized chemically. On the other hand…sometimes a plant just calls out to me and begs to be taken home!
Using Fertilizers
Now that you know what makes up fertilizer, the next question might be how to actually use the fertilizer on your tomato plants. Even tomatoes grown organically in rich soil need some help in times of swift growth or when having lots of fruit on the plant.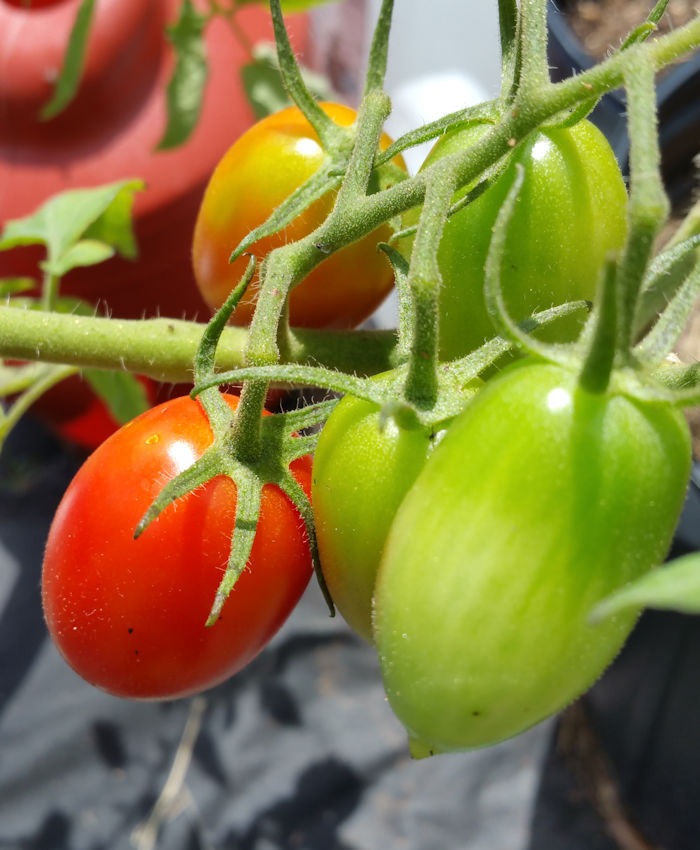
There are several ways to apply the fertilizer: foliar, liquid and granular. Each has its strengths and weaknesses, which is what I’ll discuss in this post. And in actuality, you may choose two or all three methods at different points in your tomato plant’s life.
Foliar Fertilizer
Foliar fertilizer is sprayed onto your tomato plants and absorbed through the leaves. The absorption rate is swift, and many growers (including me) swear by foliar fertilizing for healthy tomato plants.
Foliar fertilizers in general should be diluted, so that there is no chance of the plant’s leaves being burned. Good bets for organic foliar fertilizers include Terracycle, liquid seaweed and fish emulsion.
The downside for this fertilizing method is that it must be done early in the morning, before the dew dries. This is because that’s when the plant’s stoma are open and receptive. Later on in the day, the stoma are closed, so even if you did a foliar feeding, it wouldn’t be absorbed.
Some people say you can also foliar feed in the evening, when the stoma are once again open. However, I don’t like to leave my tomato leaves damp in the evening because I feel it increases the risk of fungal diseases in my humid climate.
Liquid Fertilizer
Liquid fertilizer is pretty much what it sounds like; a fertilizer diluted in water. Liquids can be used both for foliar feedings as well as drenches (i.e. pouring on the soil around the plants).
If you choose to use the liquid fertilizer as a foliar feeding, dilute to 1/2 the strength suggested on the instructions. If you choose to use it as a drench, give the plants a light watering before applying the drench.
When using a drench, make sure you aren’t splashing any soil up onto the tomato stems or leaves, to reduce the risk of any soil bacteria that may be present from getting on the plants.
Granular Fertilizer
Granular fertilizer is in solid form and generally sprinkled on top of the soil around the tomato plant. Some granular fertilizers can be mixed into the soil before you transplant into your garden or a container.
Granular fertilizers can be time-released, feeding the plant over the course of several months. However, I don’t generally recommend that because the needs of the tomato plant change as the plant gets larger and starts to bear fruit. I feel that a granular fertilizer that is good for one month is more appropriate…unless it is a granular fertilizer made specifically for tomatoes, like Tomatoes Alive!® .
I’m also including solid fertilizers like Jobe’s tomato fertilizer spikes in this category, because they function roughly the same as granular.
Don’t Over-Fertilize
The most common mistake is over-fertilizing the tomato plants. I know, it’s tempting to want the plants to grow big right away, but using a lot of fertilizer isn’t the way to get strong, healthy plants. A lighter touch yields better results.
The exception is if you are growing your tomato plants in containers. Since you need to water them more often, you’ll also need to fertilize them more often. It’s better to use less than you think you need at first, because you can always add more. But if you use too much fertilizer at one time, you risk burning the roots (not a good thing).
I grow a lot of tomatoes in containers, and I find that using a weak (no more than 1/2 strength) more often gives me better results.